Image Creation, Swapping and Making Collage
Hey Folks !
This article is all about creating our own image, crop swap and make collage of two images
Task Description 📄
🔅 Task 4.1📌 Create image by yourself Using Python Code🔅 Task 4.2📌 Take 2 image crop some part of both image and swap it.🔅 Task 4.3📌 Take 2 image and combine it to form single image. For example collage
! Creating our own image
# importing required modulesimport cv2
import numpy as np
Create image frame of size given
img=np.zeros((500,600,3)Creating circle and line for our image
img = cv2.circle(img, center=(260,250), radius=75, color=(255,255,0), thickness= -1)
img = cv2.circle(img, center=(220,240), radius=8, color=(0,0,0), thickness= -2)
img = cv2.circle(img, center=(285,240), radius=8, color=(0,0,0), thickness= -2)img = cv2.line(img, (230,280), (280,280), (0,0,0), 2)
Showing the image created
cv2.imshow("Image Bana rhe h yrr…", img)
cv2.waitKey()
cv2.destroyAllWindows()
Here is the image, We created..
Task 4.2 :- Crop and swap image
import cv2Showing the image we have or we can say reading the image
# Read wiz Image
cimg = cv2.imread('Colour_Image.jpg')# Display Wiz image
cv2.imshow("ColourImage", cimg)
cv2.waitKey()
cv2.destroyAllWindows()
#checking image size
wiz.shape# Cordinates of Colour Image
dx1 = 400
dy1 = 500
dx2 = 600
dy2 = 1000# Crop Colour Image
cFace = cimg[dy1:dy2, dx1:dx2]# Display face
cv2.imshow(“ColourCrop”, cFace)
cv2.waitKey()
cv2.destroyAllWindows()
Cropped Colour Image
Viewing Second image
# Read snoopy Image
mimg = cv2.imread(‘Mountain_Image.jpg’)# Diplay snoopy Image
cv2.imshow(“MountainImage”, mimg)
cv2.waitKey()
cv2.destroyAllWindows()
#checking image 2 size
snoopy.shape# Cordinates of Snoopy's Face
cx1 = 200
cy1 = 600
cx2 = 700
cy2 = 800# Crop Mountain Image
mFace = snoopy[cy1:cy2, cx1:cx2]# Display cropped Mountain Image
cv2.imshow("MountainCrop", mFace)
cv2.waitKey()
cv2.destroyAllWindows()
Finally here is the swapping of images
# Swap the face of Wiz with snoopy
cimg[600:800, 200:700] = mFace# Display swapped image
cv2.imshow(“CimgCropped”, cimg)
cv2.waitKey()
cv2.destroyAllWindows()
Task 4.3 :- Collage Creation
import cv2, numpyViewing first image
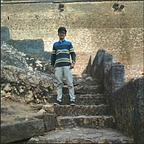
pic1 = cv2.imread(“Vijay_Image.jpg”)
pic1.shape
cv2.imshow(“Vijay”,pic1)
cv2.waitKey()
cv2.destroyAllWindows()Second Image
pic2 = cv2.imread(“Rashmi_Image.jpg”)
pic2.shape
cv2.imshow(“Rashmi”,pic2)
cv2.waitKey()
cv2.destroyAllWindows()checking shape of image vijay and rashmi
pic1.shape
pic2.shape
Resizing both images
pic1=cv2.resize(pic1,(180,250))
pic2=cv2.resize(pic2,(180,250))
Horizontal Collage
collage1 = numpy.hstack((pic1 , pic2))
cv2.imshow(“VijayRashmiCollage_Horizontal”, collage1)
cv2.waitKey()
cv2.destroyAllWindows()Vertical Swap
collage1 = numpy.vstack((pic1 , pic2))
cv2.imshow(“VijayRashmiCollage_Vertical”, collage1)
cv2.waitKey()
cv2.destroyAllWindows()That’s all guy’s
📝 ️Few Last Words
→ There Are Many things about Docker, Machine learning and DevOps , Automation that i will be discussing in my upcoming article .
→ I will be sharing many article’s on Integrating multiple tools and technologies Cloud Computing, DevOps, Big Data Hadoop, Machine Learning etc. In Upcoming days .
→ Follow me on Medium for more Article’s on Research based and integration of new new tools and technologies .
Github Link for code
For Furthur Queries, Suggestion’s Feel Free to Connect with me On Linkedin .
I Hope you learned something new from this article .
If you like it then Clap & Share ..
Thank you EveryOne For reading .!!
Thanks
